Printed Acrylic Goods Aren't a Cutting Problem — They're a Registration Problem
Two acrylic keychains can sit side by side on a shelf and look identical, yet be made by completely different processes. One is a shape that was cut out of a sheet. The other is full-color artwork that was printed first, then cut exactly along its own edge. On the shelf the difference is invisible. In prepress, it is the whole job.
If you make UV-printed acrylic goods — keychains, standees, badges, charms, photocard holders — and you went looking for nesting software, you probably found tools aimed at the wrong problem. Most "acrylic laser nesting" advice is about arranging plain shapes for a cutter. That is not what printed acrylic needs. This post is about the difference, and where the real bottleneck actually lives.
Two workflows that look the same and aren't
Plain acrylic. A clear or colored sheet goes into a laser cutter (or router). The machine cuts the outline and maybe engraves a mark. There is no printed artwork. The design is the cut path. Color comes from the sheet itself or from engraving.
UV-printed acrylic. Full-color artwork is printed onto clear or white acrylic with a UV flatbed printer, and only then is each piece cut along the outline of its artwork. The job is two stages — print, then cut — and the two have to agree on exactly where every piece sits.
| Plain acrylic | UV-printed acrylic | |
|---|---|---|
| Stages | Cut (+ engrave) only | Print → cut |
| Color | Sheet color / engraving | Full-color print |
| Registration | None needed | Print must align to cut |
| Prepress output | Vector shapes | White underlay + color + cut contour + marks |
| Who nests it | Your laser software, for free | Nobody downstream — it's a prepress job |
Plain acrylic? Use what's already in your cutter
If there is no print, the cut path is the entire job, and laying out shapes to waste less material is something your laser software's built-in nesting already does — at no extra cost and with no extra layers. If that is your workflow, you do not need Pressria Bridge for it. Use the nesting that ships with your machine. We would rather say that plainly than sell you a tool for a problem you don't have.
The moment a print step enters the picture, that calculus changes completely.
The real problem moves upstream: registration
On printed acrylic, the cutter has to land on the printed edge. Miss by a fraction of a millimeter and you get one of two defects: a thin sliver of bare acrylic around the artwork, or an illustration clipped where the blade ate into it. Neither passes. So the job was never "cut these shapes" — it is "lay the printed artwork out so that printing and cutting stay in register across the whole sheet."
That is a prepress problem, and it is precisely the part that cutting-software nesting never touches. Your cutter's nesting arranges shapes. It does not build the print file, it does not generate the white ink layer, and it does not place the alignment marks that let the print and the cut find each other.
What print-then-cut prepress actually requires
A production sheet for printed acrylic carries four things, all aligned to each other:
- Imposed color artwork. Every piece nested onto the sheet to use material efficiently — True Shape Nesting when shapes are irregular (most character goods), grid layout when they're uniform.
- White underlay. On clear acrylic, color printed alone looks transparent and washed out. A white ink layer goes under the color (and sometimes over it, for double-sided pieces), shaped to match each piece — see when and where you need a white underlay.
- Cut contour. A spot-color path — the
CutContourstandard — that the cutter reads as "cut here," following the outline of each piece rather than the artwork's bounding box. - Registration marks. So the print pass and the cut pass agree on where the sheet is positioned.
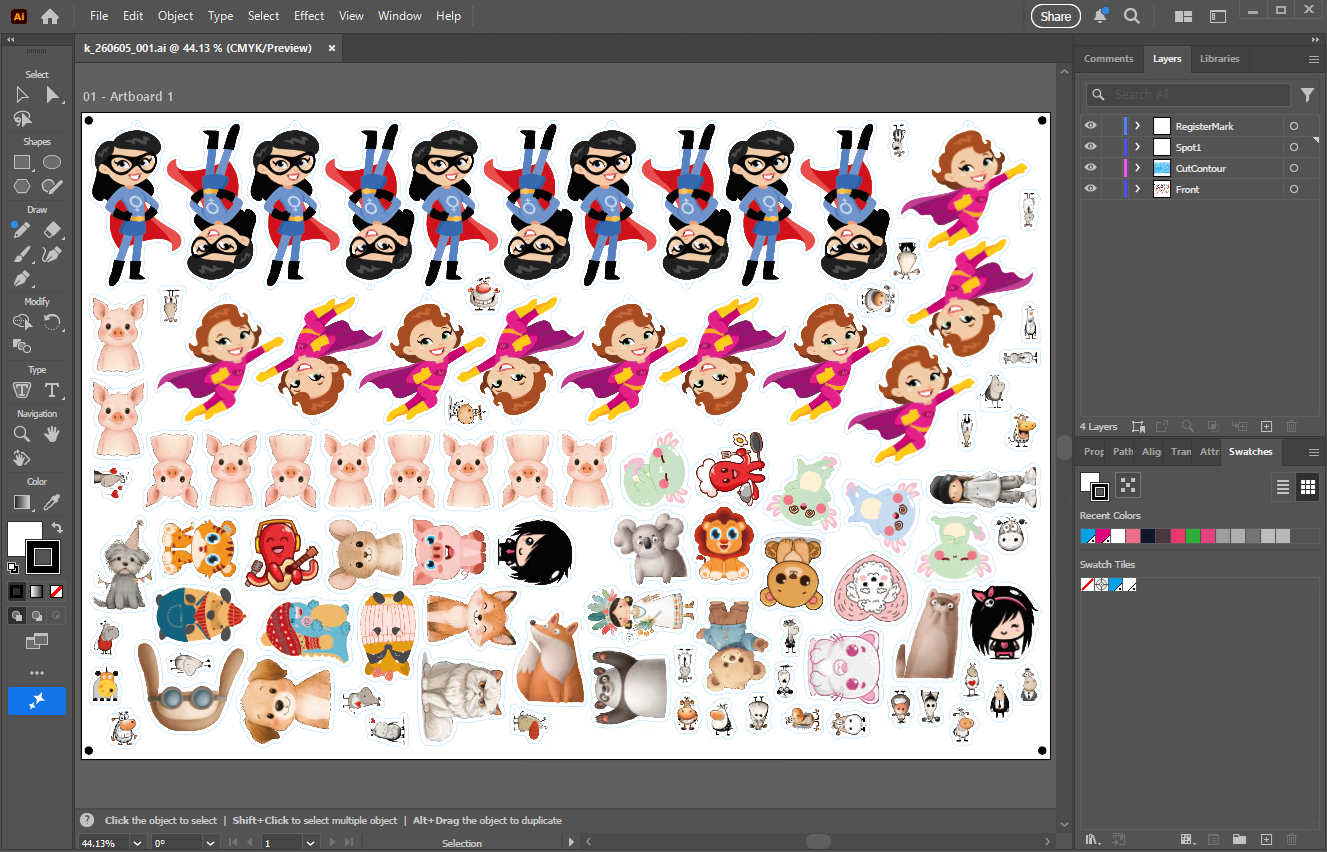
RegisterMark, a white-underlay spot layer (Spot1), CutContour, and Front (the color artwork). The hand-off is a structured Illustrator file you can inspect and adjust, not a flattened image.Build that by hand for 95 mixed pieces and you are looking at an hour or more of layer juggling per sheet — and a single misplaced contour scraps the whole run. The waste isn't just material; it's the print time already spent on a sheet that can't be cut.
Where the automation sits
This is the gap Pressria Bridge fills. You feed it the artwork; it produces a layered, print-ready Illustrator file — imposed color, white underlay, CutContour spot-color cut path, and registration marks, all in register. You review the result, send it to your UV flatbed, and cut it on whatever you own: laser, router, or digital die-cutter.
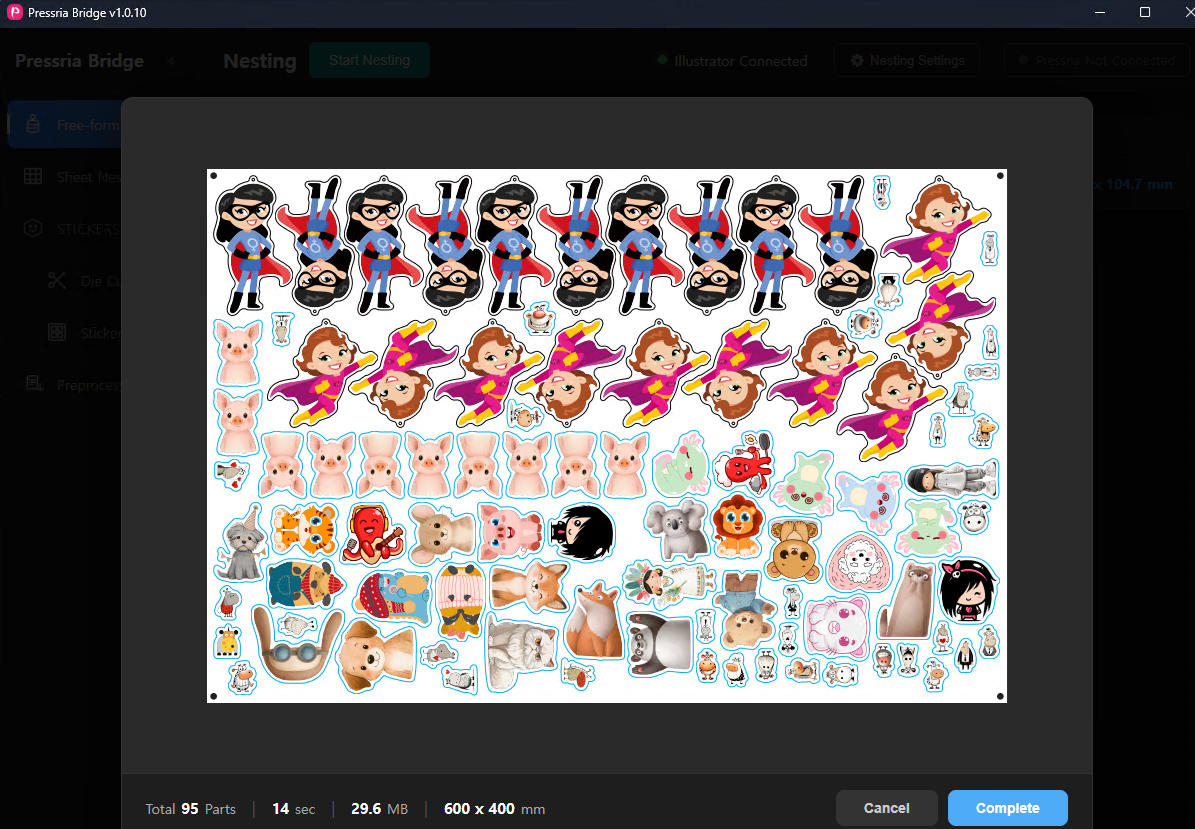
CutContour cut path, and registration marks at the corners so the print pass and the cut pass stay aligned. Demo artwork built with Creative Fabrica assets.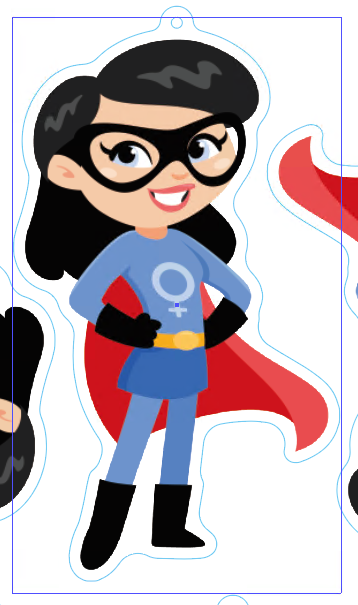
CutContour traces the artwork's true outline — keyring loop included — rather than the rectangular bounding box (shown in violet). That true-shape contour is what lets pieces interlock tightly and still cut cleanly along the printed edge.What PB hands you is a draft you confirm, not a guarantee you trust blindly — the operator stays in control of the final file. And PB's job ends at Illustrator. The cut itself stays in your hands, on your machine, with your existing maker tools. We automate the prepress up to the print-ready file; we don't drive your cutter.
One pipeline, many products
Keychains today, standees tomorrow, badges and charms next week — it is the same pipeline. The shapes change; the four-layer requirement does not. A standee is a bigger irregular outline; a badge is a small near-circular one; a photocard holder is a slotted rectangle. All of them are "print full color, then cut the outline in register," and all of them run through the same automation. For the keychain-specific walk-through with timings, see True Shape Nesting for Acrylic Keychains.
A note on cutting printed acrylic
Laser cutting works on plain acrylic beautifully, but on UV-printed acrylic the heat at the cut edge can scorch or discolor the ink right where the blade passes. That's why many printed-goods shops cut with routers or digital die-cutters instead, or tune their laser carefully. Pressria Bridge is indifferent to which you choose — it outputs the same registered, layered file regardless of how you cut it. Picking the cutting method, and dialing it in, stays your call. For a fuller comparison of laser, router, and digital cutters, see Can You Laser Cut UV-Printed Acrylic?
If your acrylic is plain, your laser software has you covered. If it's printed, the work that decides whether a sheet survives happens before anything touches the cutter — and that's the work worth automating.
Related reading: Do You Need White Ink Under Clear Acrylic Prints? · Can You Laser Cut UV-Printed Acrylic? · Registration Marks for Print-and-Cut · CutContour & PerfCutContour Spot Color Standard · True Shape Nesting With Groups · Sticker Sheet Automation